You chose Summerhill for its character. If you are preparing to sell, the way you stage should bring that character forward so buyers see it in the first photo and feel it at the front door. In this guide, you will learn how to present Victorian and Edwardian details with confidence, while keeping the home fresh and functional for today’s market. You will also find a simple room-by-room plan, a two-week workflow, and a focused photo shot list to help your listing stand out. Let’s dive in.
Why Summerhill Character Sells
Summerhill grew around the North Toronto railway station in the late 19th and early 20th century, and the area still reads as a mature, central neighbourhood with a distinct architectural story. Its tree canopy, parks, and proximity to Yonge Street shops and transit are part of the lifestyle many buyers want today. You can learn more about the neighbourhood’s context in the overview of Summerhill’s history and setting.
City planners have recognized Summerhill’s heritage value, identifying it as a Heritage Conservation District study area because of its concentrated historic resources and cohesive character. That planning background explains why many local homes still retain intact period details that buyers expect to see. You can read the staff report that outlines the study’s purpose and findings in the City of Toronto HCD study document.
Nearby green space matters too. The Rosehill Reservoir and David A. Balfour Park have been rehabilitated in recent years, which has changed how some exteriors and gardens present in photos. A tidy porch and a simple outdoor vignette can connect your home to these amenities visually. See updates on the Rosehill Reservoir project.
A Conservation-First Staging Plan
The best staging for Summerhill homes starts with conservation. Canadian heritage guidance recommends identifying and protecting a property’s character-defining elements before making changes. These are the features that set your home apart and give it value. Staging should make them visible and legible in photos and in person, not cover them up. Review the standards in the Standards & Guidelines for the Conservation of Historic Places in Canada.
Common period details you may want to highlight include:
- Bay and oriel windows
- Original hardwood floors and wide baseboards
- Decorative plaster, cornices, and ceiling medallions
- Staircases with carved newels and turned balusters
- Marble or tiled fireplaces and mantels
- Stained or leaded glass transoms and sidelights
- Pocket or French doors between parlours
- Built-ins and original bookcases
- High ceilings that add volume in photos
Neutral-modern baseline with heritage accents
A neutral palette helps period woodwork and stained glass read clearly. Keep walls soft and light, then layer a few curated accents that nod to the home’s era, such as a framed historical map or a classic-toned rug. Industry guidance supports neutralization as a way to broaden appeal while preserving character, and shows that targeted staging can improve results. See aggregated findings from the Home Staging Institute.
Image-first staging
Online photos will be your first showing. Plan your staging choices for the camera, then invest in professional photography once the home is styled. A balanced set of wide-room images and detail shots of items like the staircase, fireplace, and bay window can increase engagement. For practical photography tips and a process mindset, review the recommendations in this HomeLight guidance on listing presentation and photography.
Room-By-Room Tactics To Spotlight Architecture
Foyer and stair
- Keep the entry open and free of clutter so the eye lands on the staircase.
- If you have an original runner, have it cleaned and straightened. If not, keep floors polished and use a slim mat at the door.
- Stage a single bench or side chair to show usable scale.
- Plan at least one “hero” photo that captures the stair and landing.
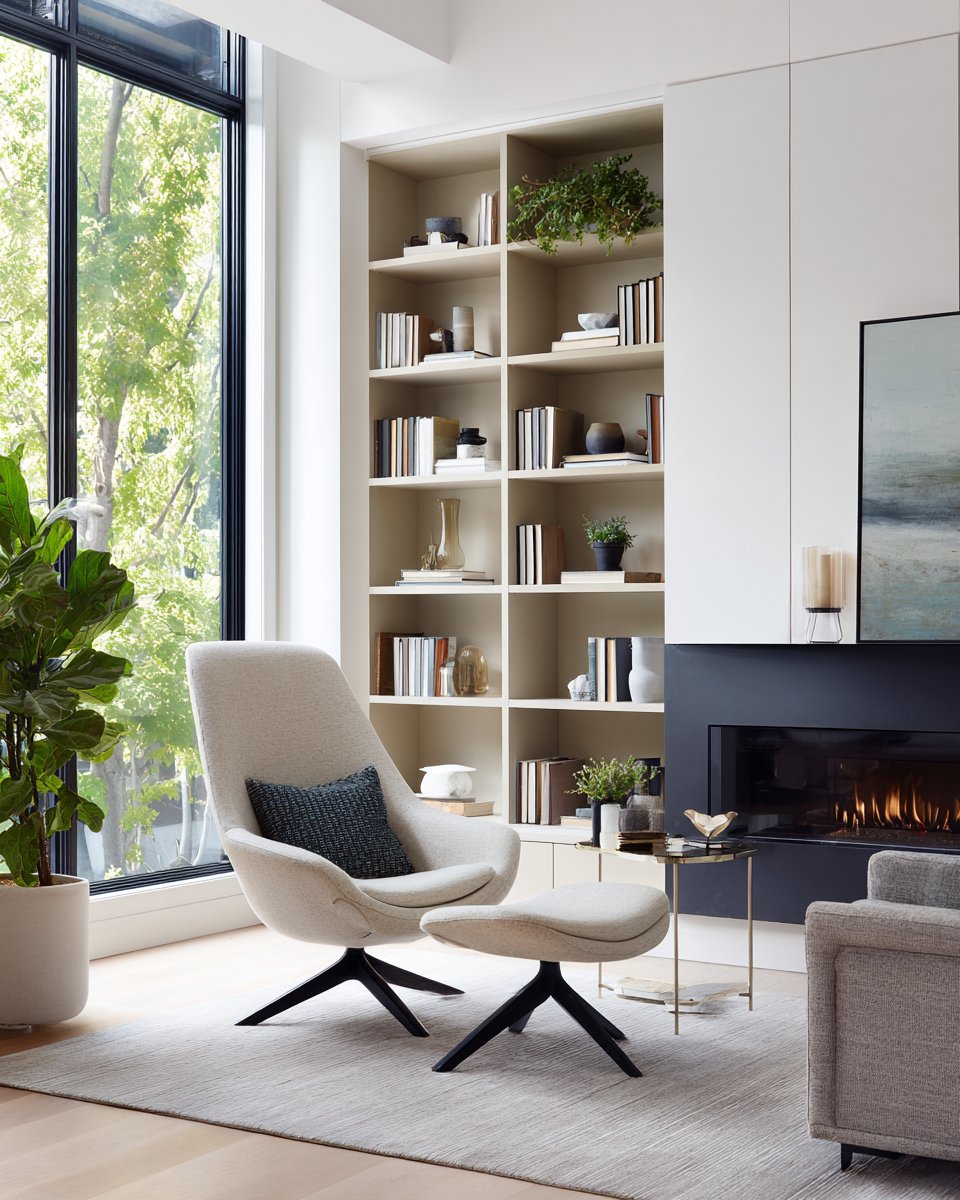
Living room or parlour
- Center the fireplace as the focal point if you have one. Arrange seating to create clear pathways.
- Choose furniture that matches the room’s scale. Tall ceilings can make oversized, low-slung sofas look small.
- Minimize heavy drapery so bay windows and stained glass stay bright in photos.
Dining room
- Use a simple table with coordinated, neutral settings.
- Remove busy window treatments and mismatched chairs that draw attention away from trim and cornices.
- If you have built-ins, light them softly and keep decor minimal.
Kitchen and bathrooms
- Keep these spaces clean, bright, and functional. Modern updates often help buyers feel at ease.
- Retain sightlines to period fabric where possible, such as original door casings or adjacent trim.
- Focus on storage solutions and lighting rather than any demolition.
Bedrooms
- Declutter and depersonalize. Keep closets tidy because buyers often look inside.
- In the primary bedroom, centre the bed and keep nightstands simple to show scale.
- In smaller townhouses, show a flexible room as an office or guest space.
Exterior and curb appeal
- Tidy planting beds, pressure-wash walkways, and touch up railings.
- Paint the front door in a period-appropriate, neutral tone.
- If you have a porch or small front garden, stage a compact seating vignette to photograph well and to echo nearby park access, including the Rosehill Reservoir and tree-lined streets.
Tailoring Tactics By Property Type
Victorian and Edwardian houses
- Use low-sheen, neutral wall paint to let original trim, floors, and medallions read clearly.
- Avoid painting original woodwork unless it is already painted and any changes are permitted.
- If floors show honest wear, clean and consider light, reversible restorative steps. Use area rugs that show floor expanses rather than covering them.
- Layer warm lighting with table lamps and subtle uplights. If a vintage pendant is present, clean and repair it so it photographs well. See photography-focused tips in this HomeLight resource.
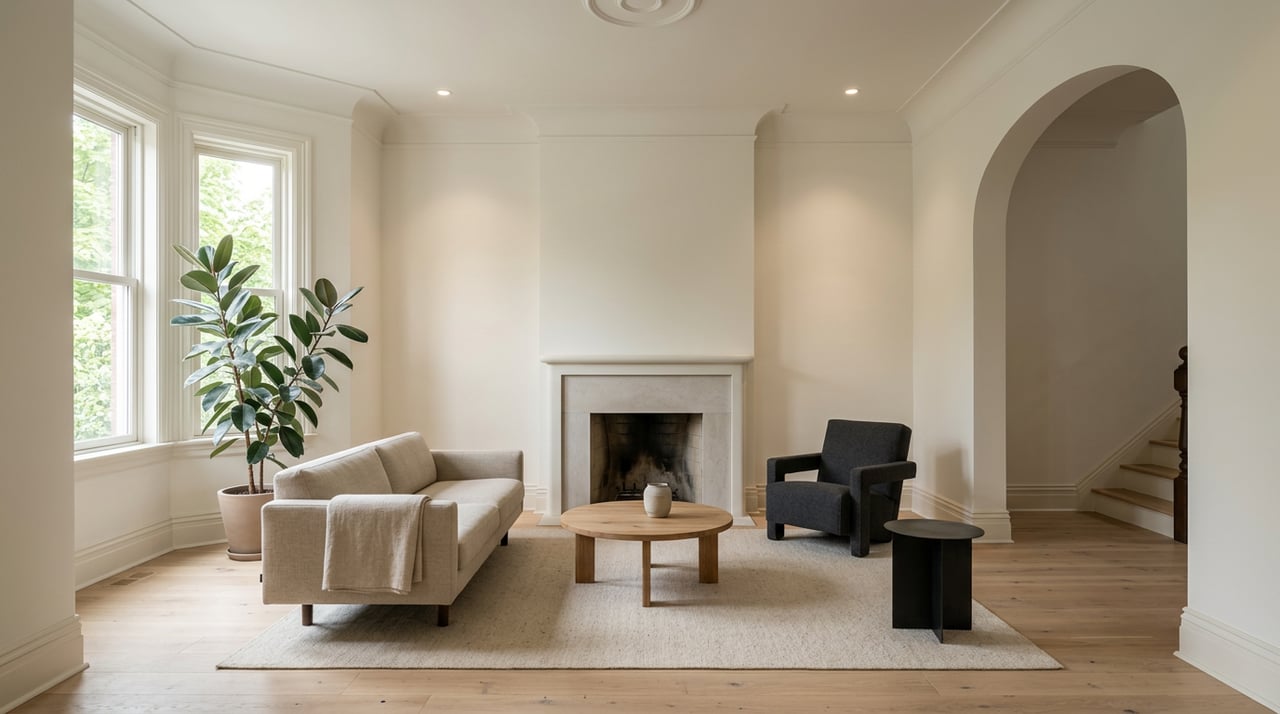
Townhouses and newer infill
- Emphasize openness and flow by removing extra furniture and using low-profile pieces that keep sightlines clear.
- Add a well-placed mirror to widen the feel of narrow floorplates and reflect light.
- Keep a coherent finish and styling palette across levels so the listing reads as one unified home. For staging priorities and buyer response data, see the Home Staging Institute’s statistics summary.
Know your permissions before you change anything
If your property is designated or listed on the Heritage Register, certain attributes may be regulated. Do not assume interior features are exempt. Check the City of Toronto’s guidance on how listing and designation work, and review any property-specific by-laws before making changes to original elements. Start here: City of Toronto Heritage Register.
If you are planning repairs or refinishing, document what you have first. The national standards recommend identifying character-defining elements and favouring repair over replacement. You can find those principles in the Standards & Guidelines for the Conservation of Historic Places in Canada.
A practical 2–3 week staging workflow
A focused pre-listing schedule keeps everyone aligned and protects the details that matter.
- Inventory and conservation check, days 1–3
- Identify and document character-defining elements and any regulatory constraints.
- Deliverable: a one-page “features to protect” list for your stylist and photographer. See conservation priorities in the national standards.
- Styling plan, days 3–7
- Prepare a room-by-room plan with neutral paint notes, furniture moves or rentals, and small accents like lamps and plants.
- Deliverable: annotated photo mockups. For staging effect and buyer response, see the Home Staging Institute’s data.
- Staging and final touches, days 7–12
- Execute the plan, complete minor repairs, and schedule a professional clean. Adjust lighting for warmth and balance.
- Deliverable: a fully staged property that reads clearly in photos.
- Professional photography, days 12–14
- Book a daylight interior shoot and a golden-hour exterior. Ask for a balanced set of wide-room images and detail shots.
- Deliverable: edited image set and a floor plan. For photography priorities, review this HomeLight guide.
Photographer shot list highlights
- Exterior: full-façade wide shot; close-up of porch and entry; twilight exterior if possible.
- Entry and stair: wide shot of foyer showing the stair; close-up of the newel post; approach shot from the front door.
- Living room: wide shots from two corners; close-ups of fireplace, moulding, and bay window seat.
- Dining room: wide shot with adjacent trim and clear circulation.
- Kitchen: wide shot; detail of counters; storage and flow to any eating area.
- Primary suite: scale, light, and a tidy closet.
- Yard or terrace: clean garden and a simple seating vignette.
- Details: stained glass, original hardware, built-ins, and one vignette that links heritage to modern living.
Budget and expected impact
- Small cosmetic staging: decluttering, editing existing furniture, and a few accessories. This is the lowest-cost path and can be owner-assisted.
- Partial professional staging: key rooms plus accessory rentals. A moderate investment many sellers use to maximize showability.
- Full staging: complete furniture rentals, styling, and photography coordination. Higher cost, often recommended for prestige Midtown listings where presentation and outcomes matter.
Industry surveys report that staging can shorten time on market and help support stronger offers. Aggregated findings show staged homes can sell much faster in many markets, with some studies citing time-to-sale improvements up to about 73 percent. Treat these as estimates and note that actual results vary by property and market segment. Review the Home Staging Institute’s summary of statistics.
Your 7-step pre-listing checklist
- Confirm heritage status and any permissions required for changes using the City of Toronto Heritage Register.
- Deep clean and repair small items so the home reads as cared for.
- Selectively neutralize paint to highlight trim, floors, and stained glass.
- Right-size furniture to show circulation and volume, especially around fireplaces and bays.
- Make mantels, stair details, mouldings, and ceiling medallions the star of each room.
- Book professional photography with a clear shot list and timing for the best light.
- Refresh curb appeal so exterior images connect to Summerhill’s mature trees and nearby parkland.
Final thoughts
Staging a Summerhill home is not about erasing history. It is about making your architecture legible to a modern buyer in photos and in person. When you identify your character-defining elements, stage with a light hand, and capture polished images, you allow buyers to see the lifestyle and the legacy in one view.
If you would like a design-informed strategy for your sale, including a tailored staging brief and boutique marketing that honours your home’s story, connect with Jason DeLuca.
FAQs
What features should you highlight in a Summerhill Victorian or Edwardian?
- Focus on bay windows, original floors, fireplaces, stair details, stained glass, built-ins, and high ceilings that show volume, following conservation-first guidance.
Do you need city approval to change original features in a Summerhill home?
- If your property is designated or listed, specific attributes may be regulated. Check the City of Toronto Heritage Register and any by-laws before altering original fabric.
How do you stage a narrow Summerhill townhouse to feel larger?
- Remove extra furniture, choose low-profile pieces, use a mirror to reflect light, and keep one coherent palette across floors to emphasize flow and perceived space.
Why invest in professional photography for a heritage listing in Toronto?
- Photos are the first showing. Professional images that balance wide shots and detail close-ups can increase engagement and help your architecture read clearly.
What paint approach best showcases period woodwork and trim?
- Use low-sheen, neutral walls to let original wood take the lead. Avoid painting unpainted trim unless already permitted and appropriate for the property.
How does proximity to Rosehill Reservoir and David A. Balfour Park shape curb appeal?
- A tidy porch, fresh front door, and simple garden vignette create a visual bridge to nearby green space, which can enhance exterior photos and lifestyle cues.